Advanced properties of a graphic include additional properties beyond the basic properties.
When you click on a shape, all its properties (both basic and advanced) will be displayed in the "Graph Line", "Content Fill" and "Basic Transformation" panels in the sidebar.
If you want to change the advanced properties of the graphic border, please click the "Graphic Line" panel in the expanded sidebar to set it.


1) Line switch, that is, setting whether the line is present or not.
2) Line thickness, that is, the thickness of the line, is entered using a numerical value.
3) Line color: you can select the color of the line in the color palette.
4) Line transparency, that is, select the transparency of the line. The value ranges from 0.0 to 1.0, indicating completely transparent to completely opaque.
5) Line style, you can select the type of line, the default is solid line, you can choose other as follows:
dash 
dashdot 
Dotted line (dot) 
Long dash 
Long dash dot dash line (longdashdot)
Short dash
Short dash dot dash line (shortdashdot)
Short dash two dot dash line (shortdashdotdot)
Long dash two dot dot line (longdashdotdot)
Short dot dashed line (shortdot)
6) Start (end) arrow type, which can add an arrow to the line. The arrow type is optional, and the default value is none. The types are:
block 
classic 
diamond 
open 
oval 
7) Start (end) arrow width: you can select the width of the arrow. There are three options: medium (default), narrow (narrow), and wide (wide).
8) Start (end) arrow length: you can select the length of the arrow. There are three options: medium (default), short (short), and long (long).
9) Joint style, that is, the style of the bends or turns when the line is a curve. There are three options: round (rounded, default), bevel (bevel), and miter (sharp corners).
If you want to change the advanced properties of the graphic fill, click to expand the "Content Fill" panel in the sidebar to make settings.
As shown in the figure:

1) Fill switch, that is, set whether to fill.
2) Fill mode, that is, select the fill content mode of the graphic. There are six modes:
solid——Fill with solid color, i.e. single color
Gradient——fill with linear gradient color
gradientradio - fills a sharp corner or a circle (if and only if the circle is a "curve" from "AutoShapes") with a gradient color
3) Basic fill color, you can choose the fill color. When the "Fill Mode" is selected as gradient, this color is the first level color. Please click to expand the color palette to select.
4) Fill transparency: You can select the transparency of the fill color, ranging from 0.0 to 1.0, representing completely transparent to completely opaque.
Note: You can only set the transparency of the primary color.
5) Secondary transition color, that is, when the "Fill Mode" is selected as gradient, you can select the second level fill color. Please click to expand the color palette to make a selection.
6) Gradient color allocation, that is, when the gradient color requires three or more, please use this setting. Click in the input box to pop up the "Gradient Color Allocation" setting panel.

Drag the slider above to set the primary color. The R (red) G (green) B (blue) component values are displayed in the right display box, and "%" is the starting position of the color in the graph. The set color and position will be displayed in the middle above. After confirming, click "Add", the color will appear in the graph and be displayed in the middle at the top of the panel
 .
.
Note : The position (i.e. percentage) of the colors must increase step by step, i.e. the percentage of the second level must be greater than that of the first level.
For example, to make a rectangle with a gradient of red, green and blue.
a) Draw a rectangle on the canvas, select it, expand "Content Fill" in the sidebar, turn on "Fill Switch", and select the gradient mode in "Fill Mode".
b) Click the input box to pop up the "Gradient Color Assignment" setting panel. Set the first level color to red and the position to 0%.

A. Drag the slider to set the color

B. After clicking Add, it will be displayed at the top
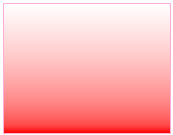
C. Effects of graphics in the canvas
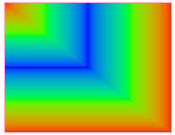
c) Set the secondary color to green and the position to 50%.

A. Drag the slider to set the color

B. After clicking Add, it will be displayed at the top
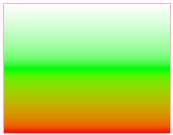
C. Effects of graphics in the canvas
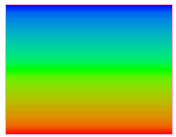
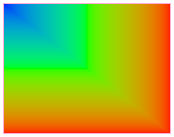
d) Set the tertiary color to blue and the position to 100%.

A. Drag the slider to set the color

B. After clicking Add, it will be displayed at the top

C. Effects of graphics in the canvas
7) Gradient tilt angle, you can select the gradient tilt angle. Please select the graphic and click in the input box, a "slider" will pop up, drag the slider to adjust the angle, the range is 0 to 360 degrees.
Note: Only valid for linear gradient mode.
8) Set the focus to change the position of the gradient focus. Please select the graphic and click in the input box, a "slider" will pop up, drag the slider to adjust the position, the range is 0 to 1. As shown in the figure,
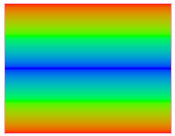

0 0.5 1

0 0.5 1
If you want to change the size, position, zoom ratio, tilt angle, rotation center and rotation angle of the graphic, please click the "Basic Transformation" panel in the expanded sidebar to set it.

Among them, "Current Tilt Angle" is the angle to which the graphic is rotated, and "Rotation Angle" is the angle to which the graphic is rotated. For the correct input items, please refer to the instructions on how to rotate and flip the graphics, how to scale and adjust the graphics, and how to correct the basic properties of the graphics.
